Asset Management
The Asset Management page is used for unified management of all assets. It supports adding, editing, deleting assets, directory maintenance, and access authorization, helping administrators efficiently organize and control resources.
Asset Tree
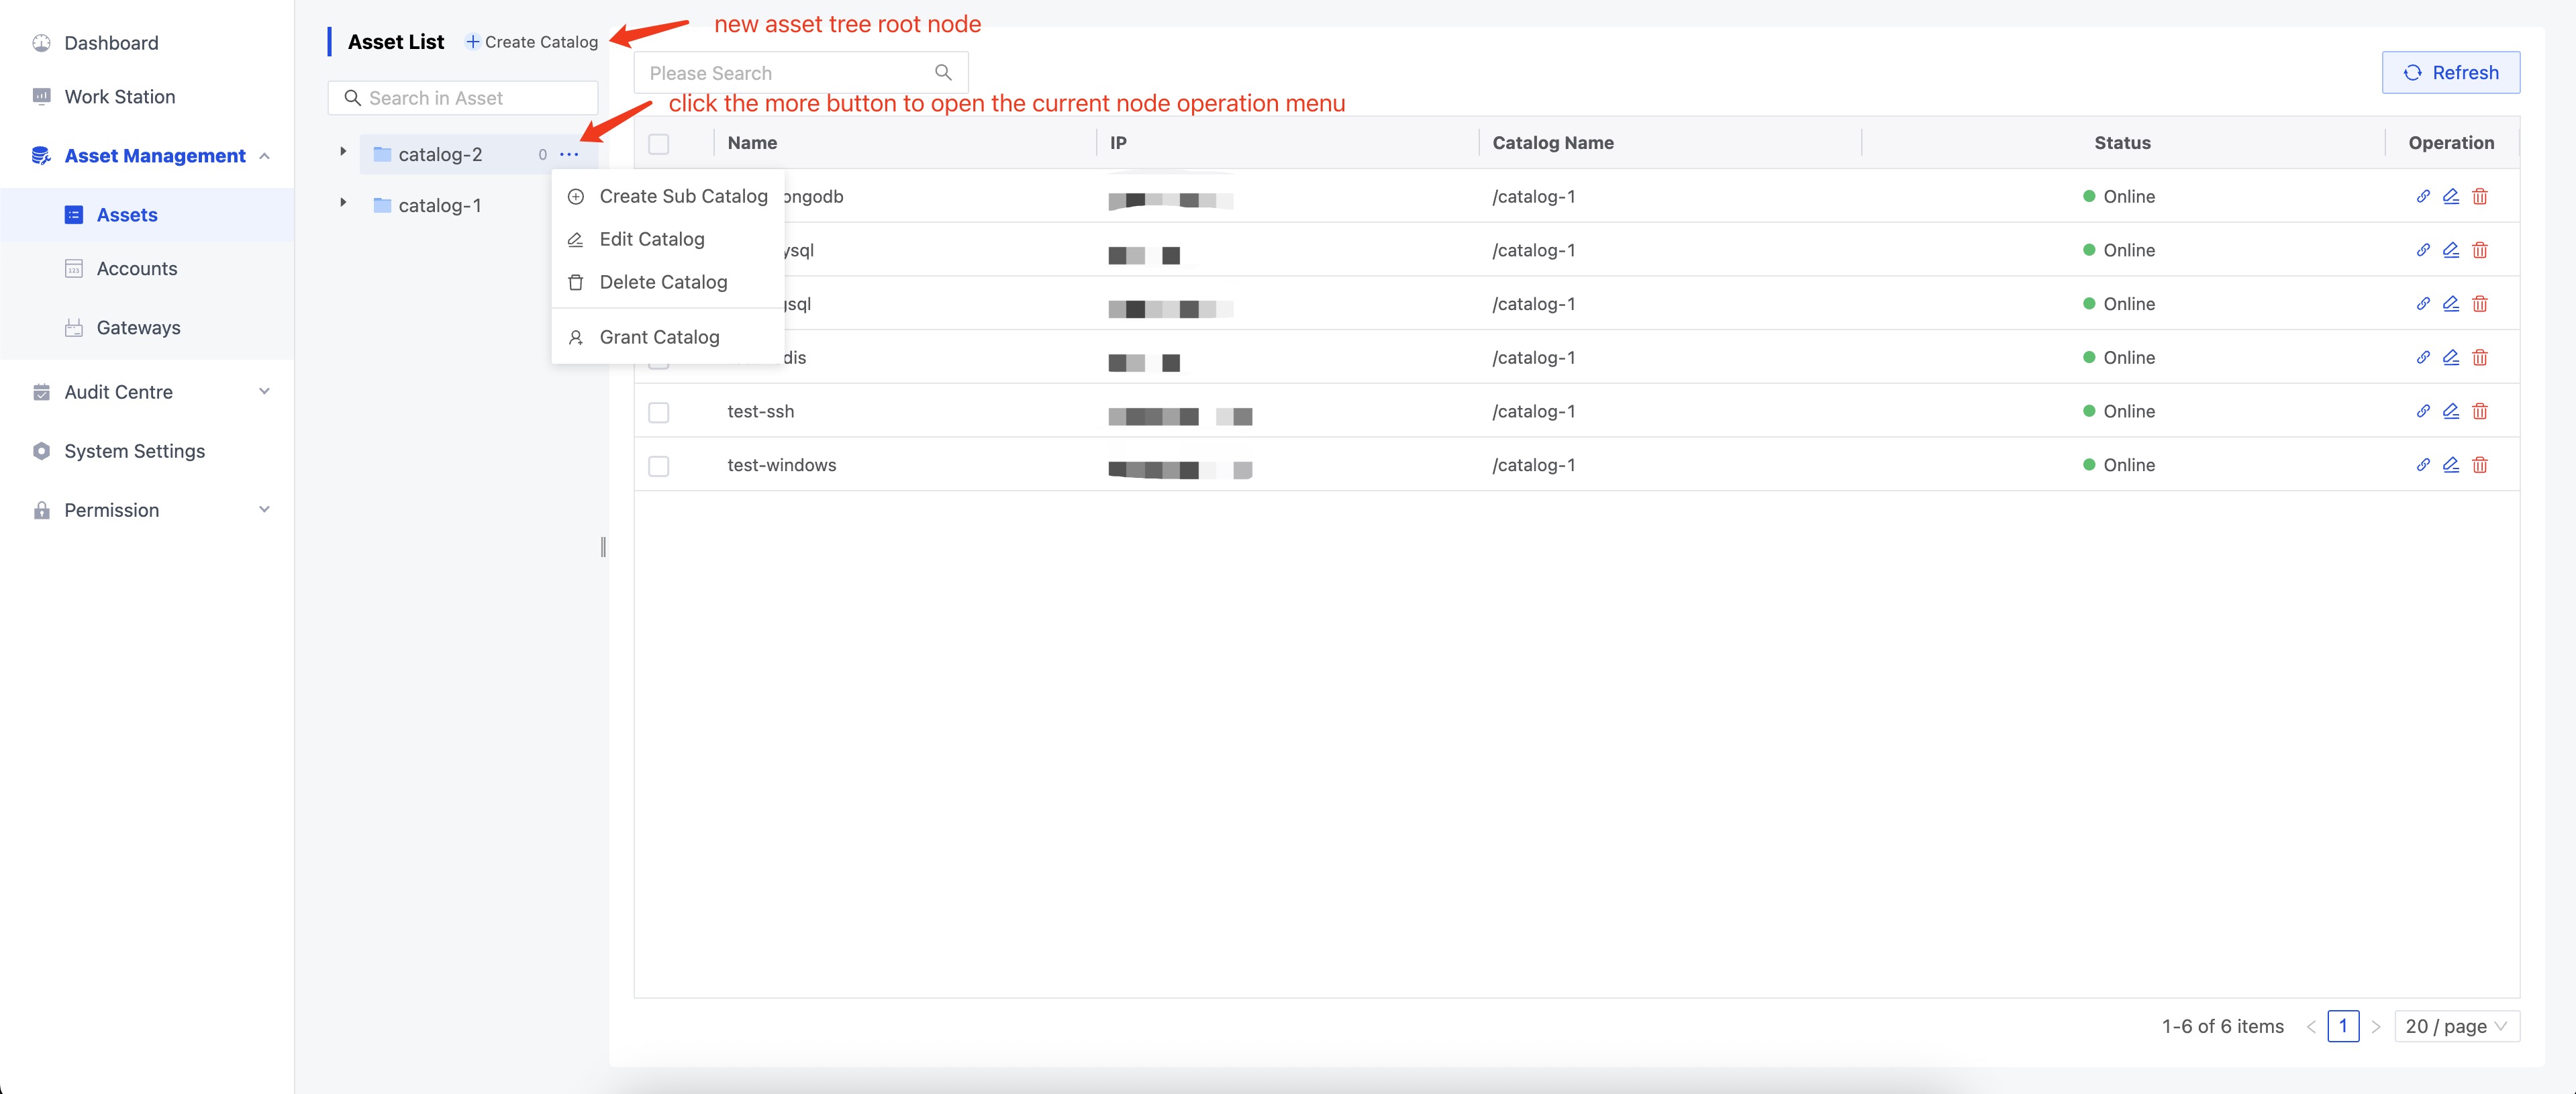
- Asset Tree classifies and manages assets through a directory structure, making them easy to organize and find. Users are free to design and adjust the asset catalog structure according to actual needs.
- You can create new catalogs, edit, delete, and authorize the current catalog by clicking the operation menu on the right side of the catalog node.
If a subcatalog or asset exists in the catalog, the delete operation is not allowed!
Add Asset
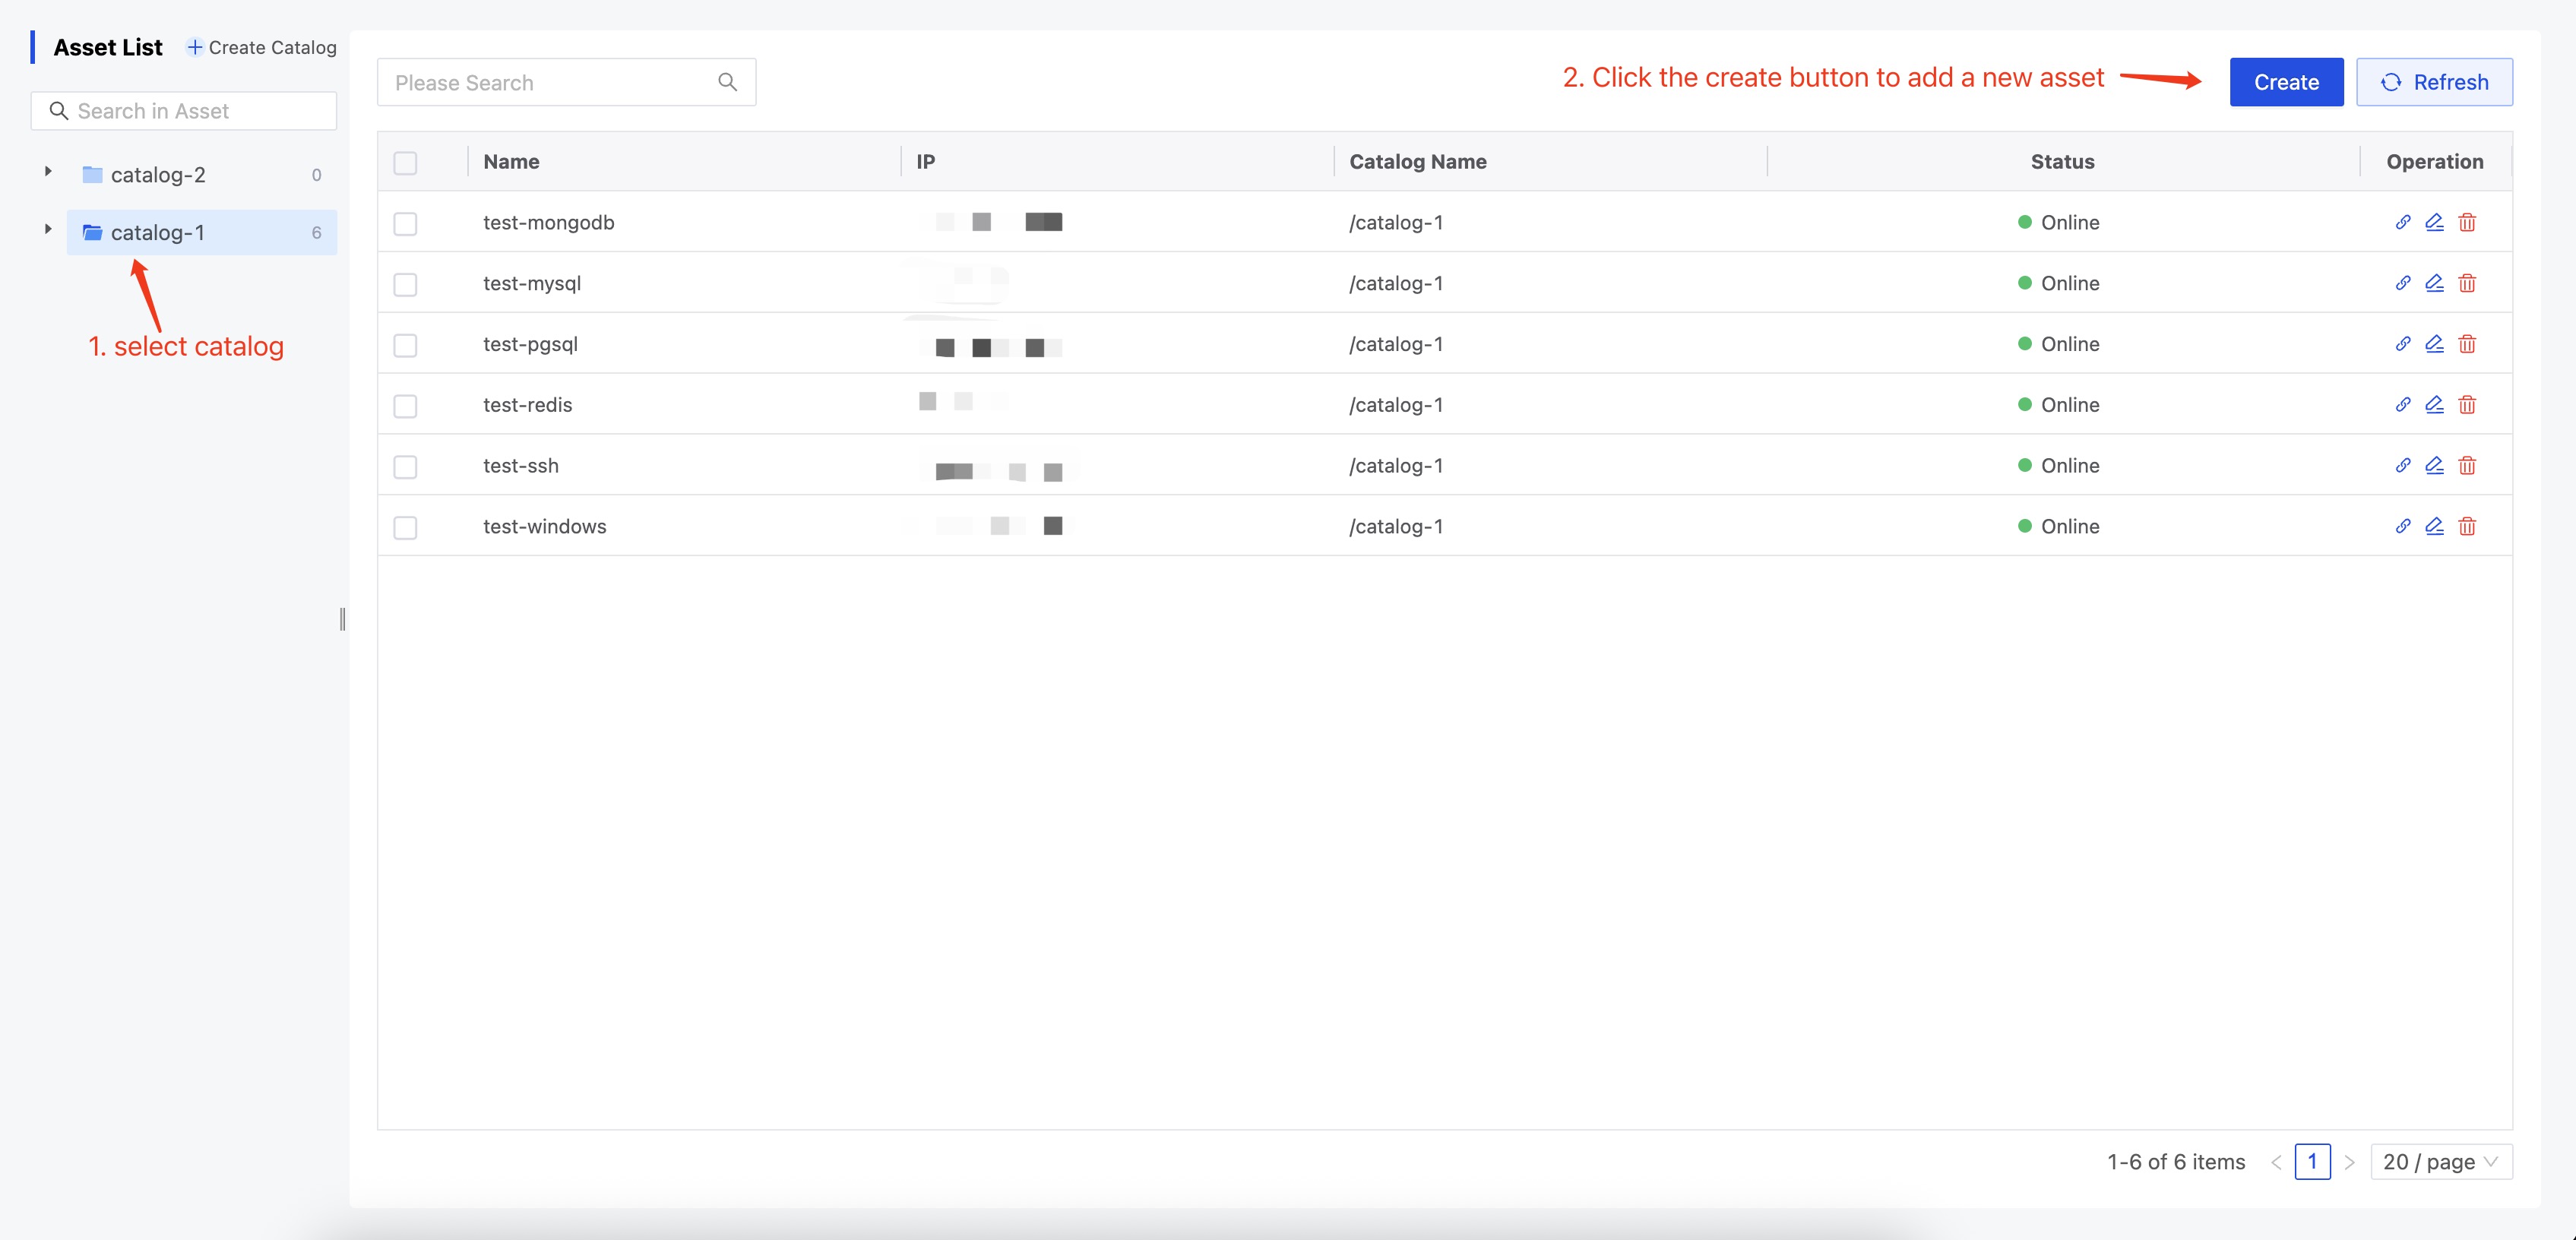
Administrators can add new assets by clicking the [Create] button in the upper right corner after selecting a catalog.
Add Asset Parameters
| Category | Parameter | Description | Required |
|---|---|---|---|
| Basic Info | Name | Asset alias, for easy management and lookup | ✓ |
| IP | Server IP address | ||
| Folder | Asset directory location | ✓ | |
| Comment | Asset Remarks | ||
| Protocol | Protocol | Asset Login Protocol | |
| Web Protocol Configuration | Web Protocol Configuration Parameters | ||
| Gateway | Preconfigured in Resource Control - Gateway Management | ||
| Account Authorization | Account | Preconfigured in Resource Control - Account Management | |
| Grant Role | Select the authorization role for the current account | ||
| Operation Permissions | Connect, Share, Upload, Download, Copy, Paste | ||
| Access Restrictions | Time | Visually and flexibly configure access time periods within a week | |
| Time Zone | Time zone for the current time period | ||
| Command Filter | Preconfigured in Resource Control - Command Filter |
Web Protocol Configuration Parameters
When editing an asset with HTTP or HTTPS protocol type, the following detailed configuration options are available:
| Category | Parameter | Description | Required |
|---|---|---|---|
| Access Policy | Access Mode | Full Access: All HTTP methods are allowed; users can operate freely Read Only: Only configured HTTP methods are allowed, restricting the scope of operations | |
| Max Concurrency | Limits the number of sessions that can open the website at the same time Note: After closing the browser window, the session is not immediately destroyed; it takes about 45 seconds for the concurrency count to be released | ||
| Blocked Paths | Multiple forbidden access paths can be configured to enhance security | ||
| Enable Watermark | When enabled, a watermark is automatically displayed on the access page |
Create Temporary Link
The temporary connection feature allows administrators to assign temporary access permissions to users, ensuring access is granted only when necessary and reducing security risks.
In the asset list, administrators can use the action bar to create a temporary connection for a specified asset.
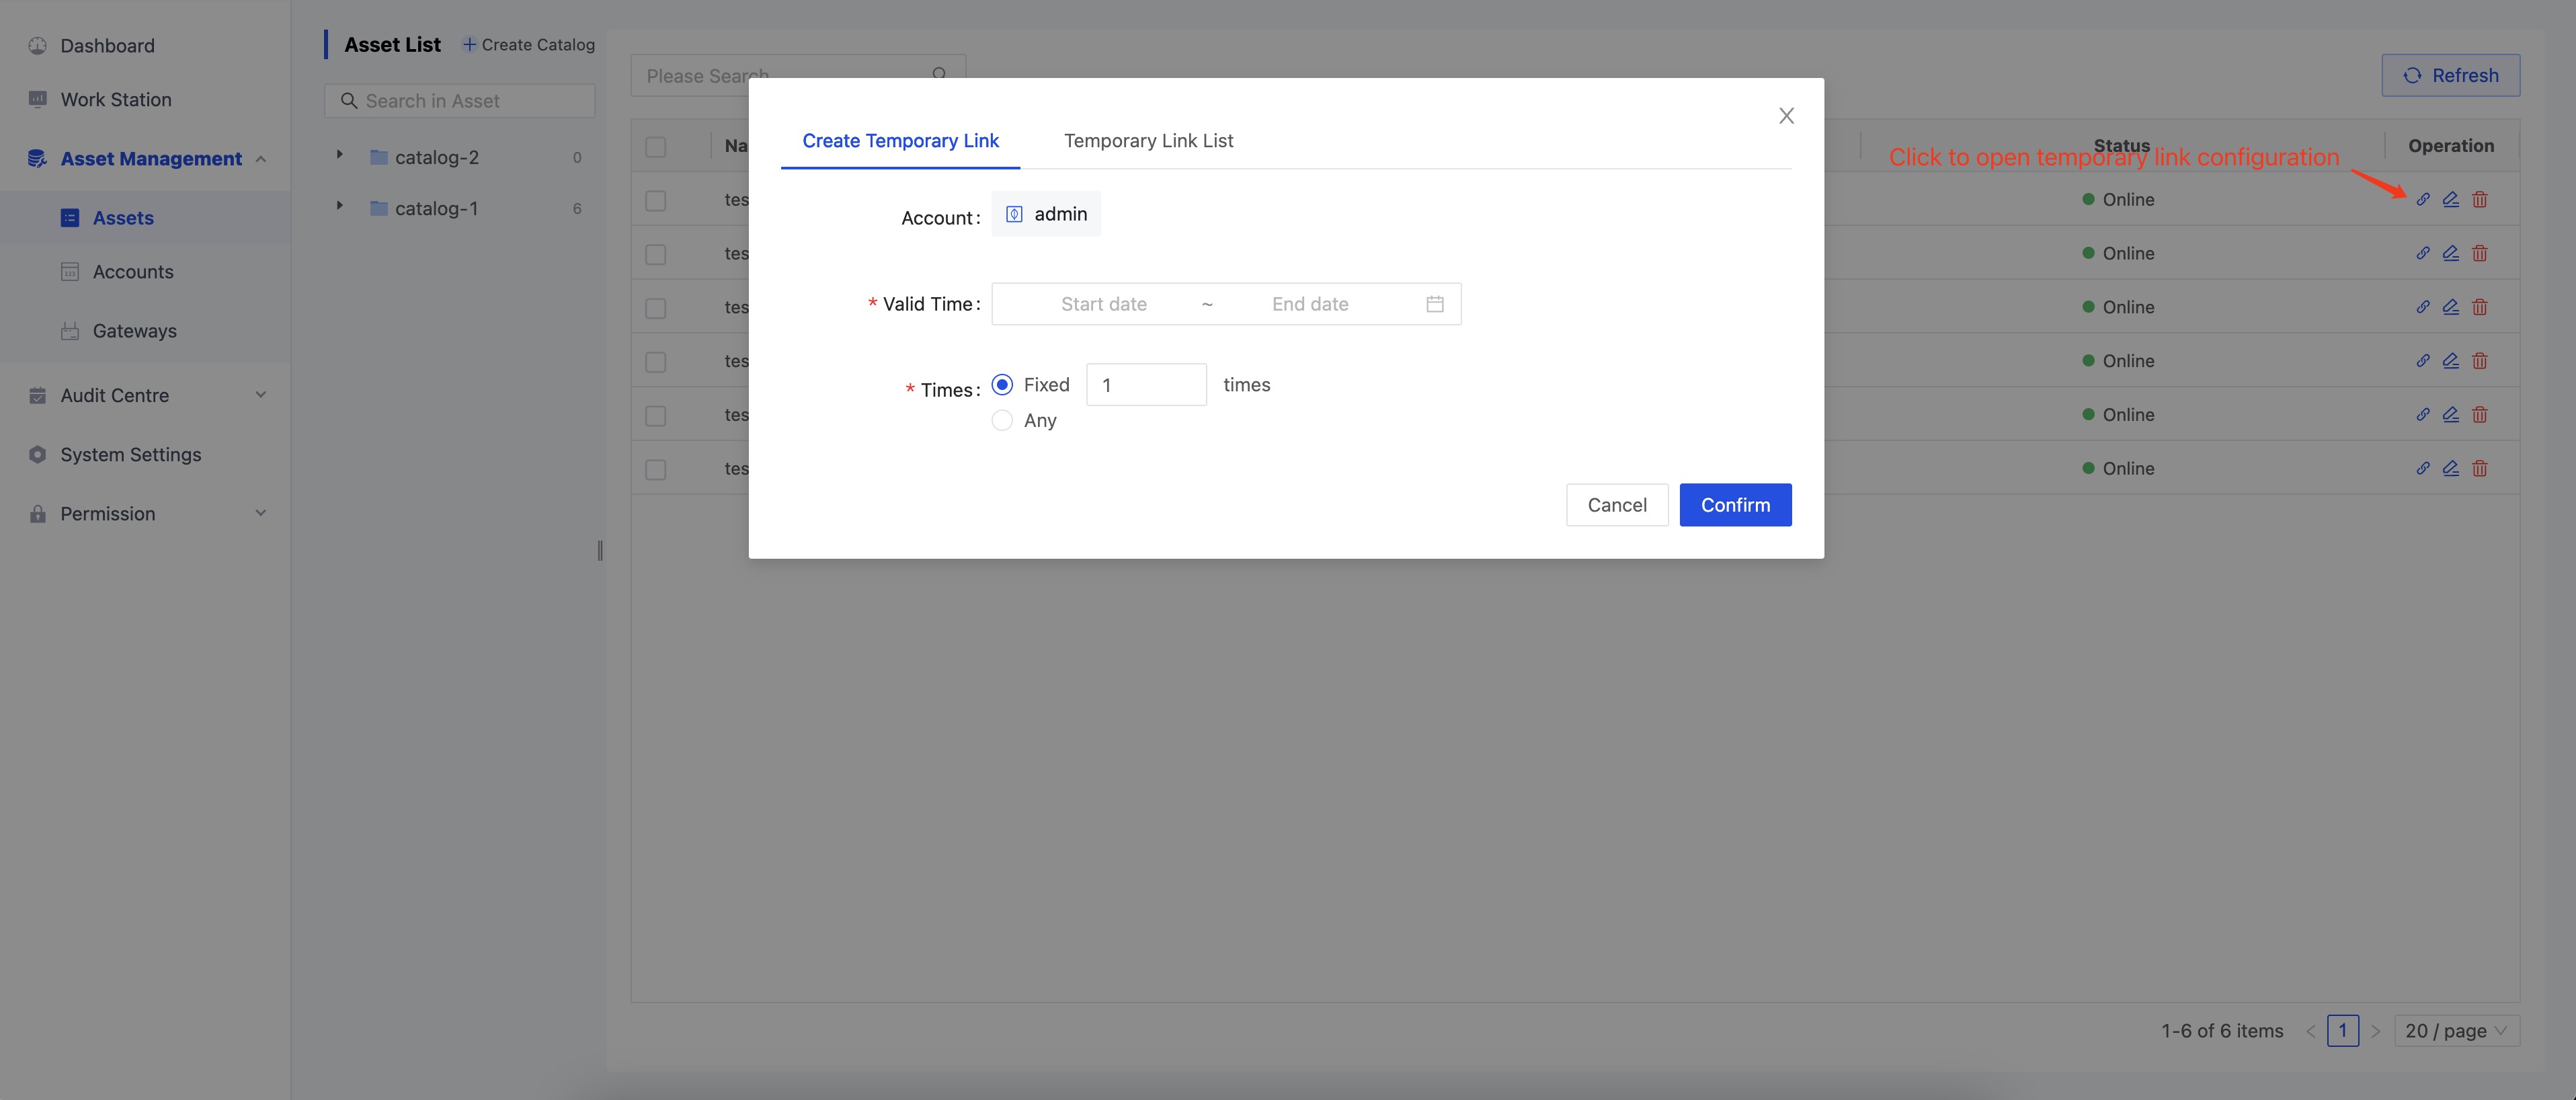
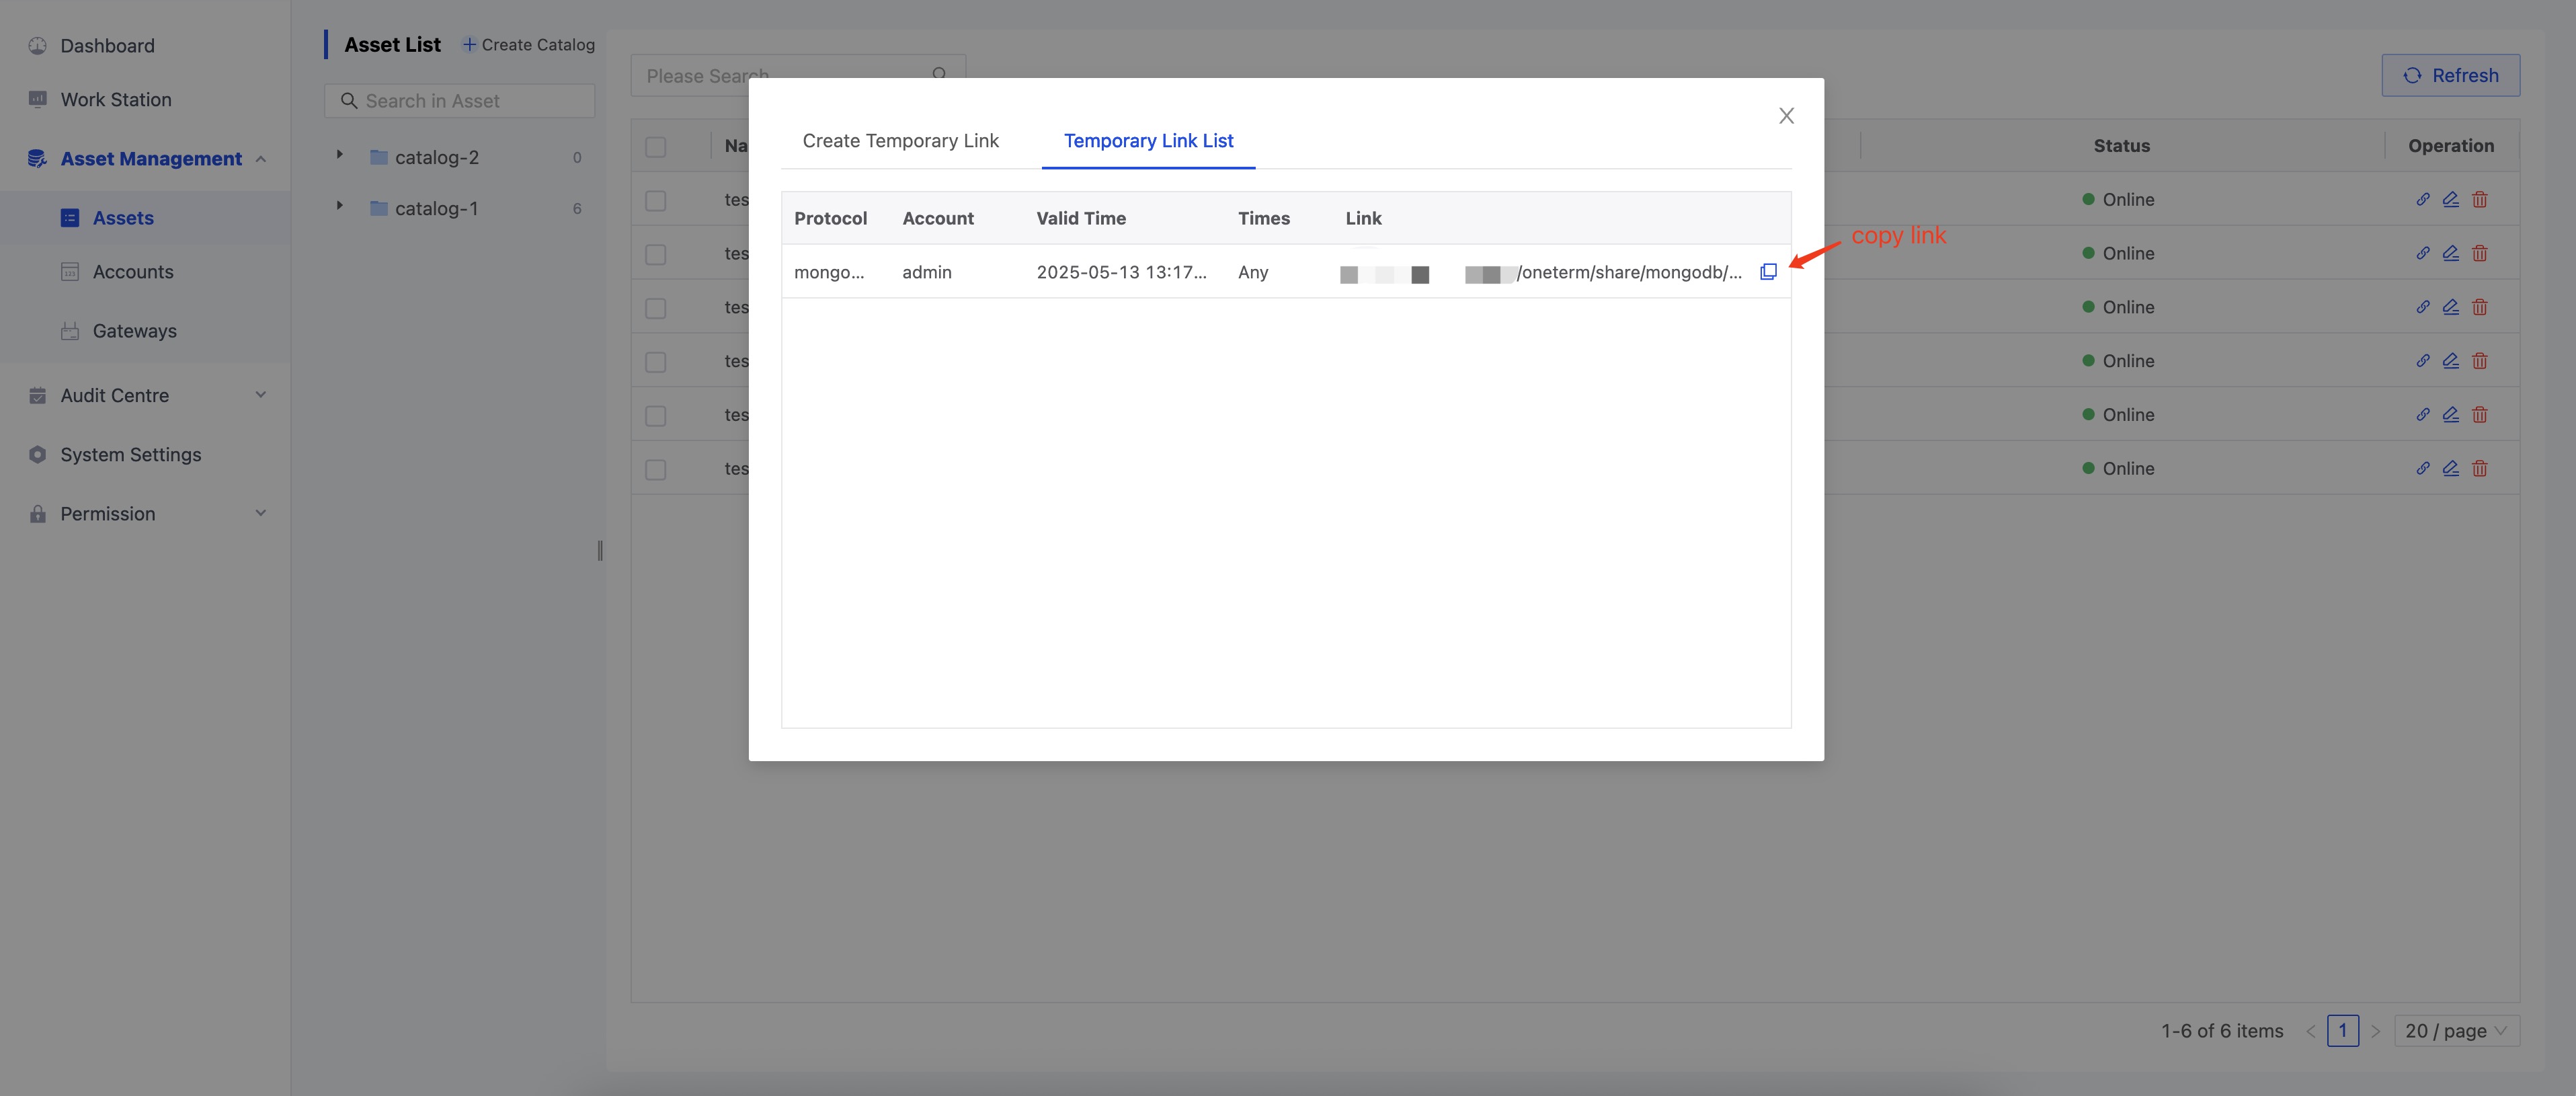
As shown above, first select the account, then choose the validity period (the effective time of the temporary connection; permissions will be automatically revoked after expiration) and the number of allowed accesses. Click “Confirm” to successfully create a temporary connection, and you will be redirected to the “Temporary Connection List.” Click the copy button on the right to copy the temporary access link:
Authorization
Node Authorization
- Administrators have full permissions for the asset tree. Regular users need to be authorized to view, update, delete, or authorize asset tree nodes.
- Node permissions support downward inheritance. After a node is authorized, users will automatically obtain permissions for the node, its subnodes, and assets.
Hover over the right side of an asset tree node and click the cascade menu “Authorize Folder” to open the authorization dialog.
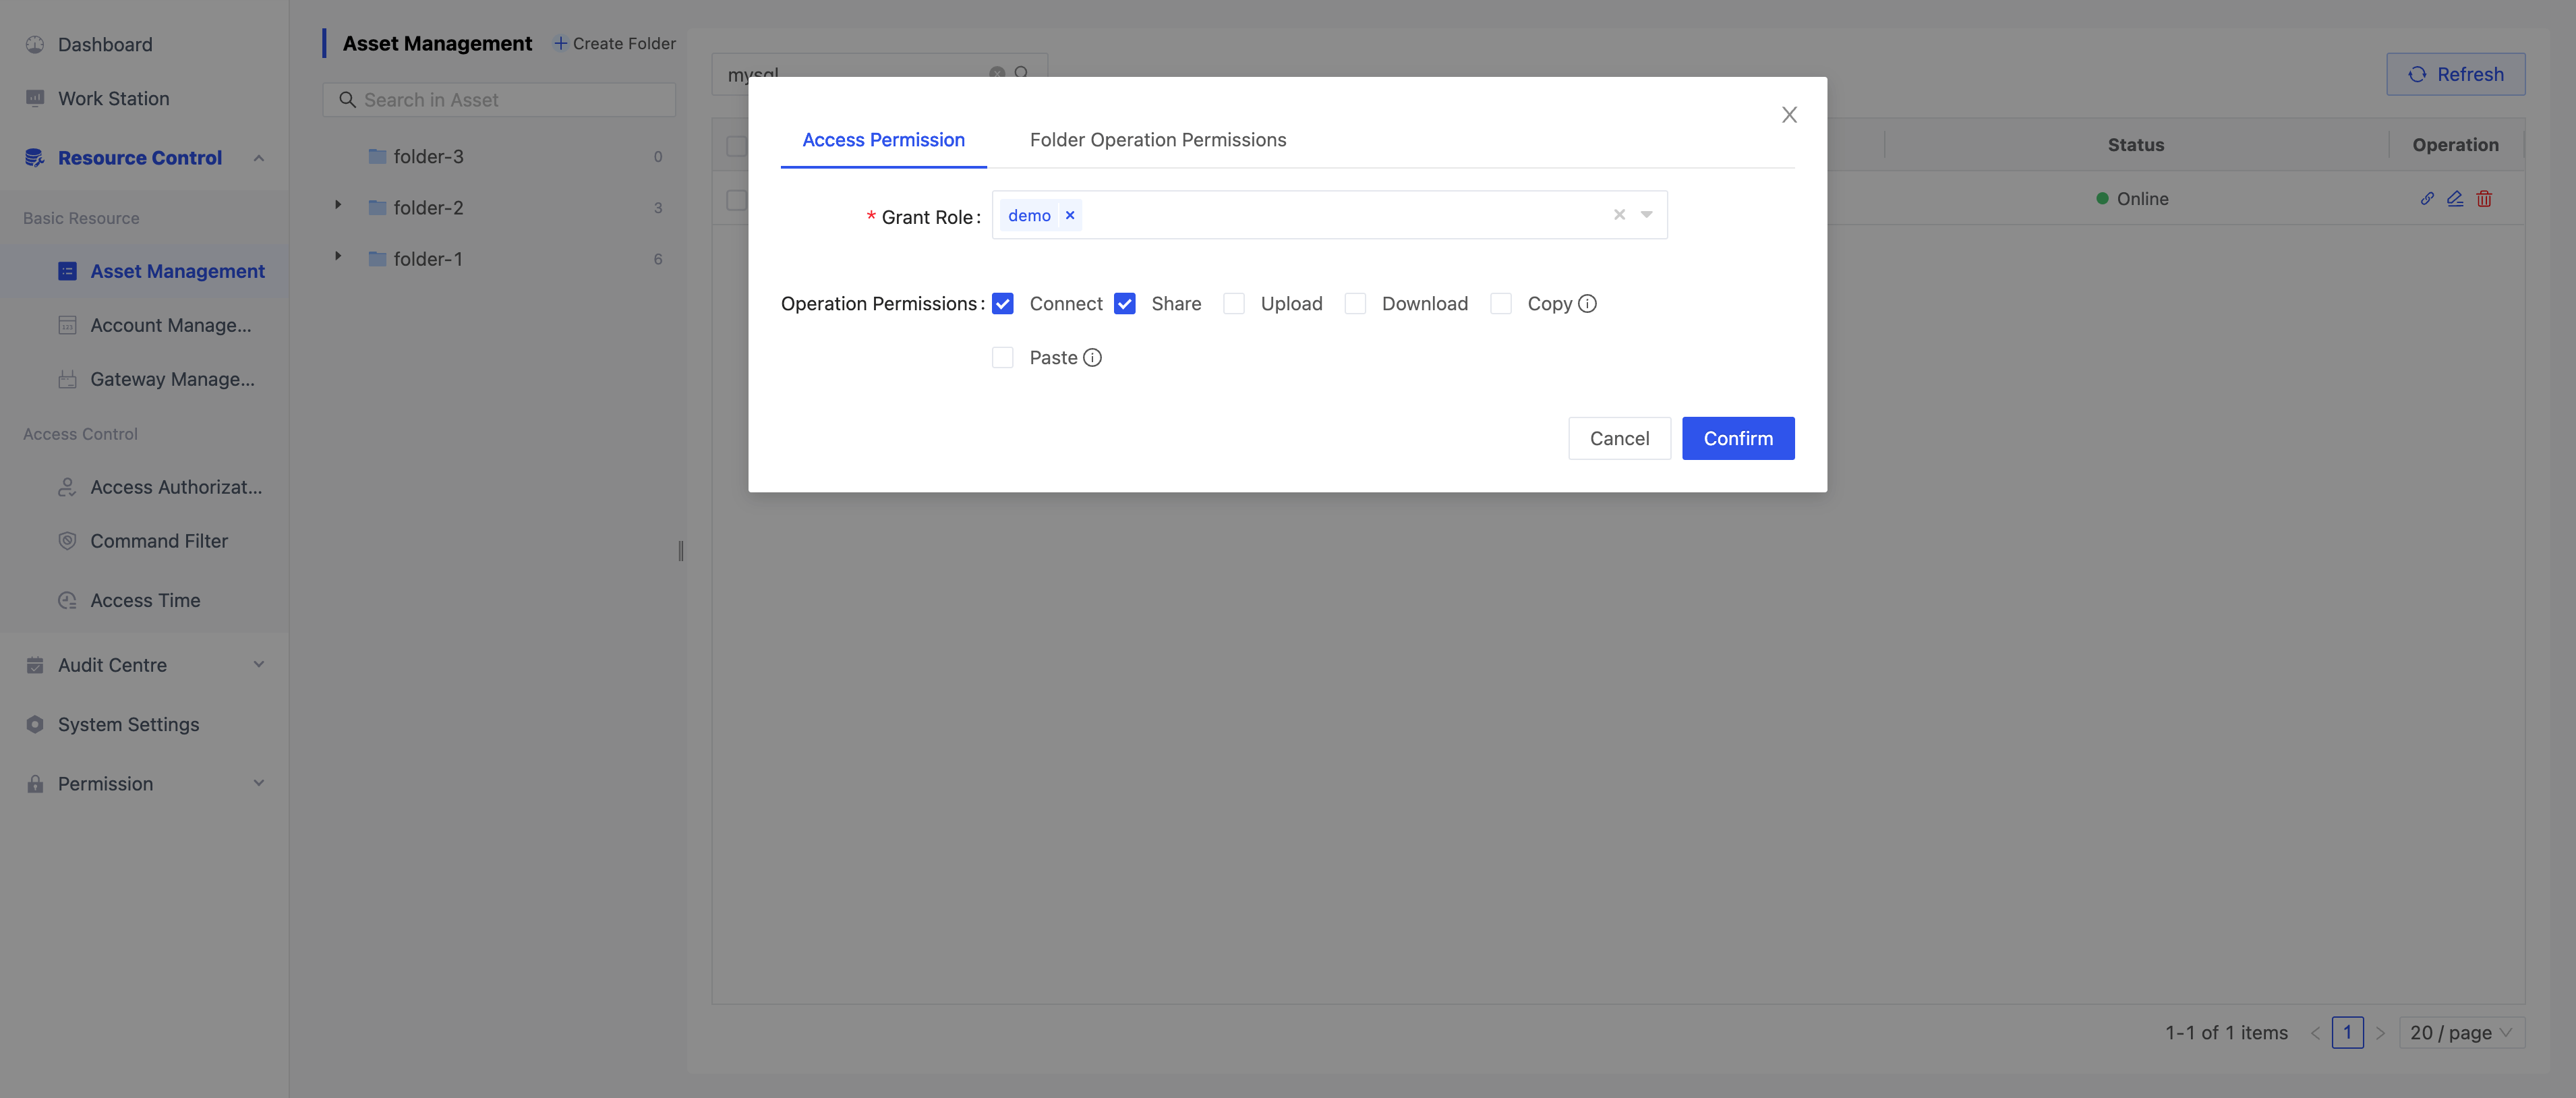
As shown above, users can configure access permissions and Folder operation permissions.
- Access Permission: Select the authorization role and check the operation permissions. After clicking confirm, the selected role will obtain the corresponding operation permissions.
- After access permission authorization is successful, a corresponding authorization configuration will be generated on the Resource Control - Access Authorization page.
- Authorization configuration naming rule:
node-FolderID-UUID
- Folder Operation Permissions: After authorization, users can view, update, delete, and authorize the node, its subnodes, and assets on this page.
Asset Authorization
Select the checkboxes on the left side of the asset table, then click the “Authorize” button in the upper right corner to open the asset authorization dialog.
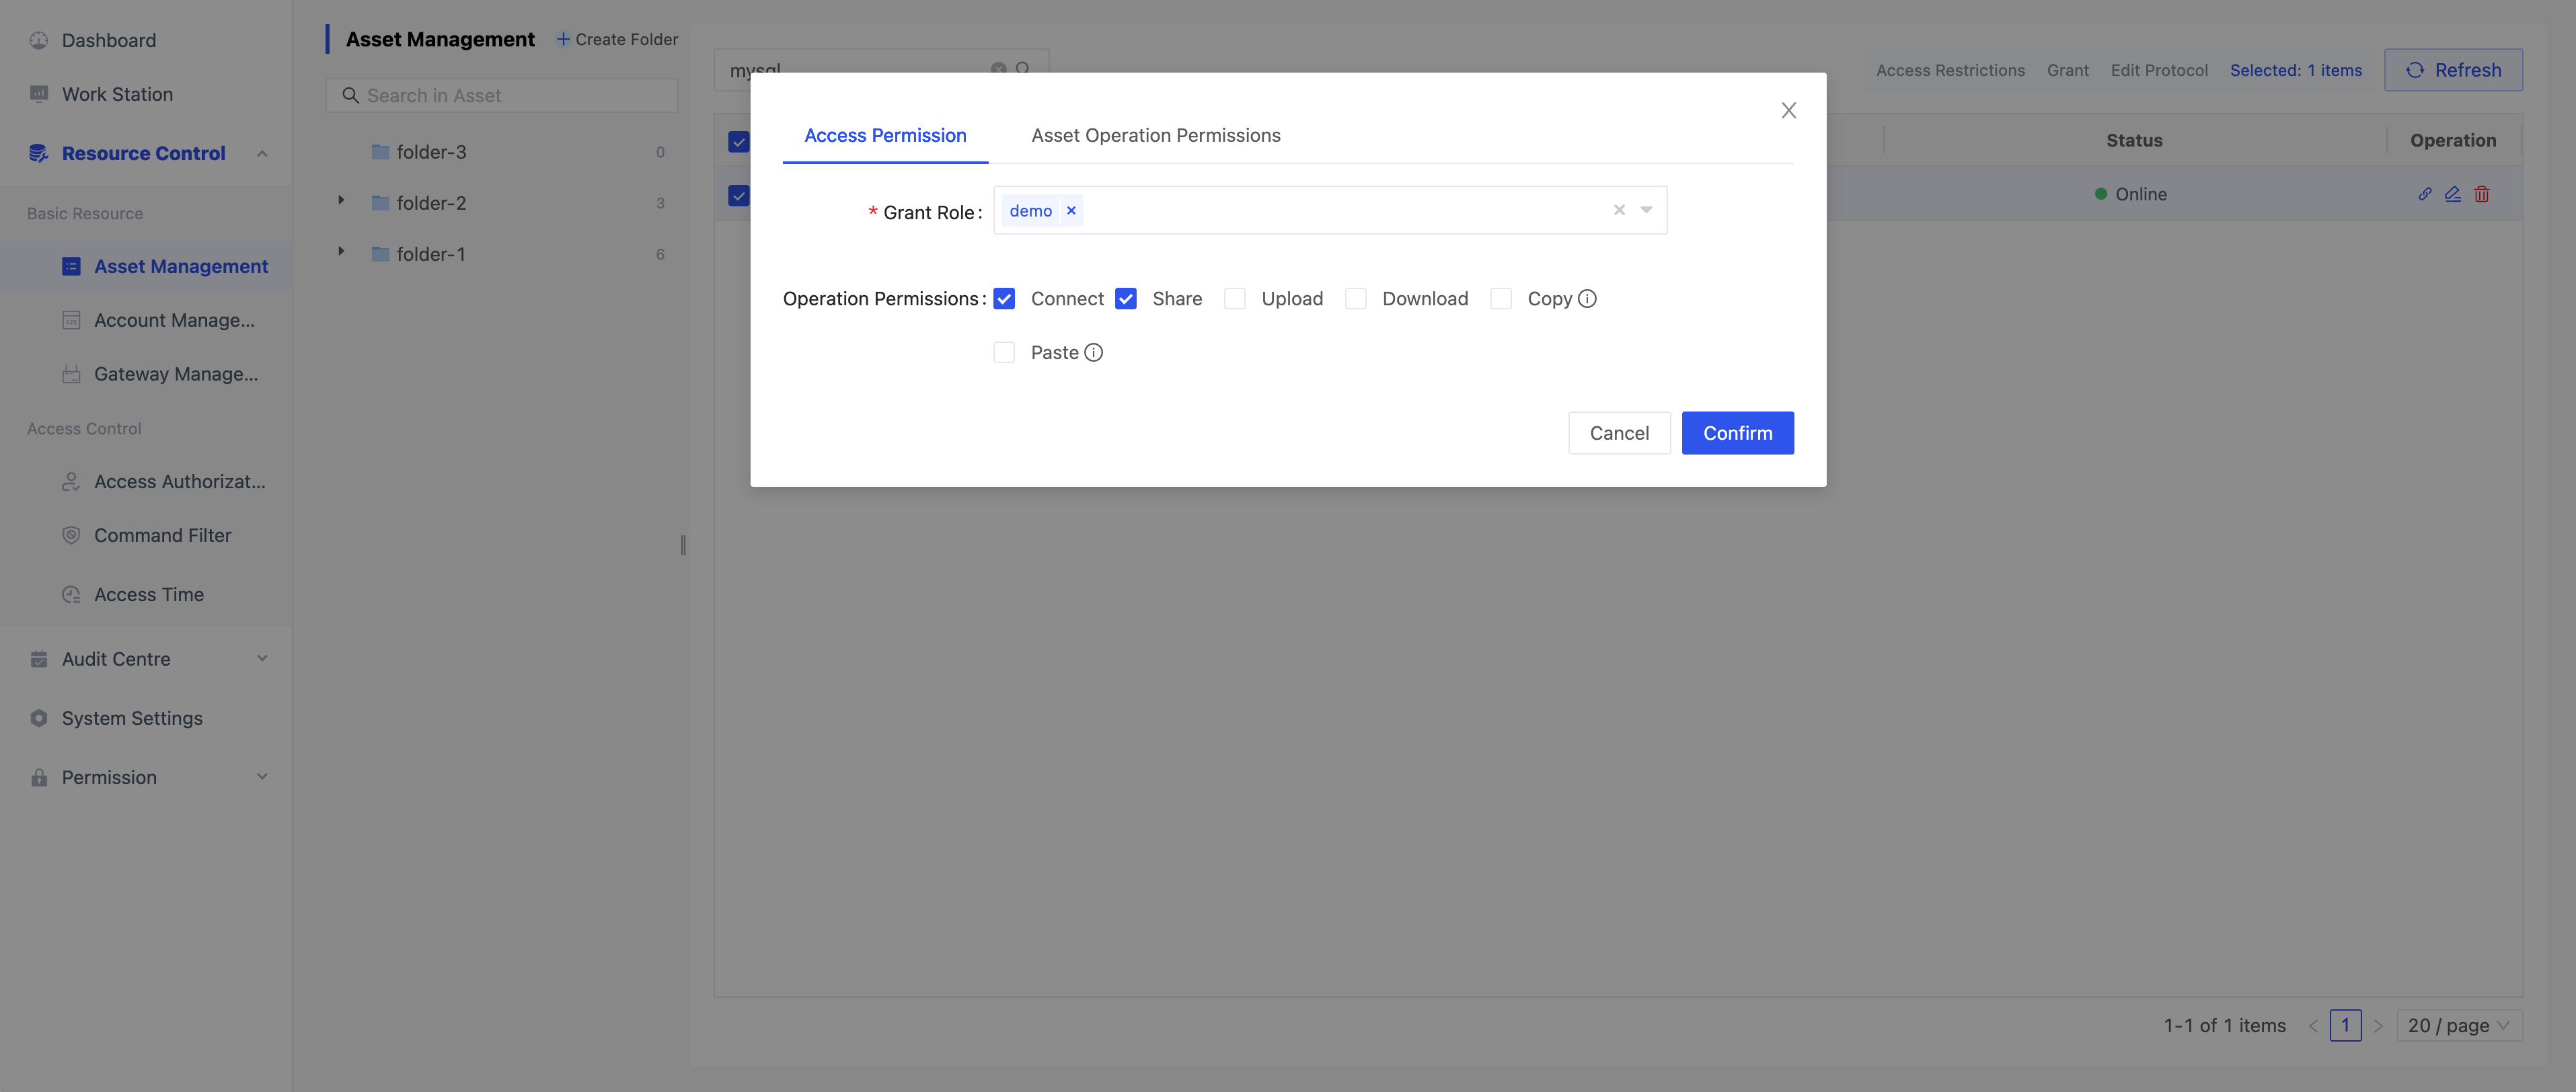
As shown above, users can configure access permissions and asset operation permissions.
- Access Permissions: Select the authorization role and check the operation permissions. After clicking confirm, the selected role will obtain the corresponding operation permissions.
- After access permission authorization is successful, a corresponding authorization configuration will be generated on the Resource Control - Access Authorization page.
- Authorization configuration naming rule:
asset-Asset1ID,Asset2ID,Asset3ID...-UUID
- Asset Operation Permissions: After authorization, users can view, modify, delete, and authorize the asset on this page.
- Note: Asset operation permissions can only be configured when a single asset is selected.